How to Break In Work Boots Faster & Easier (Without Destroying Them)
Last updated: February 2026
Breaking in new work boots doesn’t have to mean weeks of blisters and foot pain. This guide combines method stacking protocols, quantified timelines, and job-specific strategies so you can start working comfortably in days—not months.

Quick Answer — The Fastest Break-In Methods at a Glance
Need to get your boots job-ready fast? Here’s the safest, quickest path ranked by speed:
- Boot stretcher method: approximately 5 hours of stretching time
- Leather conditioner + wear: 1–2 hours active wear, then overnight rest
- Stretching spray: 5–30 minutes before wear for targeted areas
- Domestic wear (around the house): roughly 1 week of daily sessions
- Thick socks method: roughly 1 week of gradual stretching
- Boot rotation (two-pair strategy): approximately 2 weeks
- Natural break-in without intervention: 80–100 hours of total wear
Pro tip: Combine multiple methods (method stacking) to cut break-in time dramatically. Conditioner + stretcher + thick socks can achieve significant progress within 24 hours for properly fitted boots.
Why Work Boots Need Breaking In
Quality work boots are built tough. The same durable materials that protect your feet on the jobsite make them stiff out of the box. Understanding what’s happening during break-in helps set realistic expectations.
What Happens to Leather During Break-In
When you wear new boots, several physical changes occur:
- Leather fibers loosen and mold to your unique foot shape
- Cork midsoles (in Goodyear welt construction) compress and conform to your arch and heel
- Creases form at natural flex points—primarily at the ball of foot and ankle
This process creates a custom fit that no amount of factory sizing can replicate. A broken-in boot essentially becomes a mold of your foot.
Factors That Affect Your Break-In Timeline
Not all boots break in at the same rate. Several variables influence how long you’ll spend in the uncomfortable phase:
- Leather thickness: Heavier leather (8–9 oz) takes considerably longer than thinner hides. For a deeper understanding, the Work Boot Anatomy & Construction Materials guide explains how different materials affect comfort and durability.
- Construction type: Goodyear welt boots have a longer initial break-in than cement construction but offer superior long-term moldability. Our Work Boot Soles Explained guide covers the differences in detail.
- Brand differences: Heritage boots from PNW makers (Nicks, Whites, JK Boots) typically require extended break-in periods compared to mass-market imports
- Fit accuracy: Wrong size = longer, more painful break-in. A boot that doesn’t fit correctly will never break in comfortably—no method fixes poor sizing.
What You’ll Need — Tools and Products Checklist
Gather these supplies before starting any break-in method:
Essential Items:
- [ ] Boot stretcher (two-way adjustable with bunion plugs)
- [ ] Leather conditioner or mink oil
- [ ] Boot stretching spray
- [ ] Thick Merino wool socks (2–3 pairs)
- [ ] Moleskin padding or blister plasters
- [ ] Horsehair brush (for cleaning before conditioning)
Optional but Helpful:
- [ ] Boot dryer (for moisture removal after wear)
- [ ] Brannock device or printable sizing guide (to verify fit before committing)
Important: Always verify your boots fit correctly before investing time in break-in. If your boots are the wrong size, no amount of stretching will make them comfortable. Our Work Boot Fit & Sizing Guide walks you through proper measurement and fit verification.
10 Proven Break-In Methods (Ranked by Speed)

Method 1 — Boot Stretcher (Fastest Mechanical Option)
A boot stretcher is the fastest way to mechanically widen leather and relieve pressure points.
How it works: An adjustable crank mechanism widens the leather gradually over several hours. Two-way stretchers can expand both length and width.
Timeline: Approximately 5 hours
Best for: Boots that are slightly too narrow or have specific pressure points on the toe box or sides.
Step-by-step process:
- Insert the stretcher into the boot until it reaches the toe box
- Turn the handle counter-clockwise until you feel resistance
- Apply one additional turn—don’t overdo it
- Leave in place for approximately 5 hours
- Remove and test fit with your normal work socks
- Repeat if needed, adding one turn at a time
Product consideration: Look for two-way stretchers with bunion plug inserts that target specific tight spots.
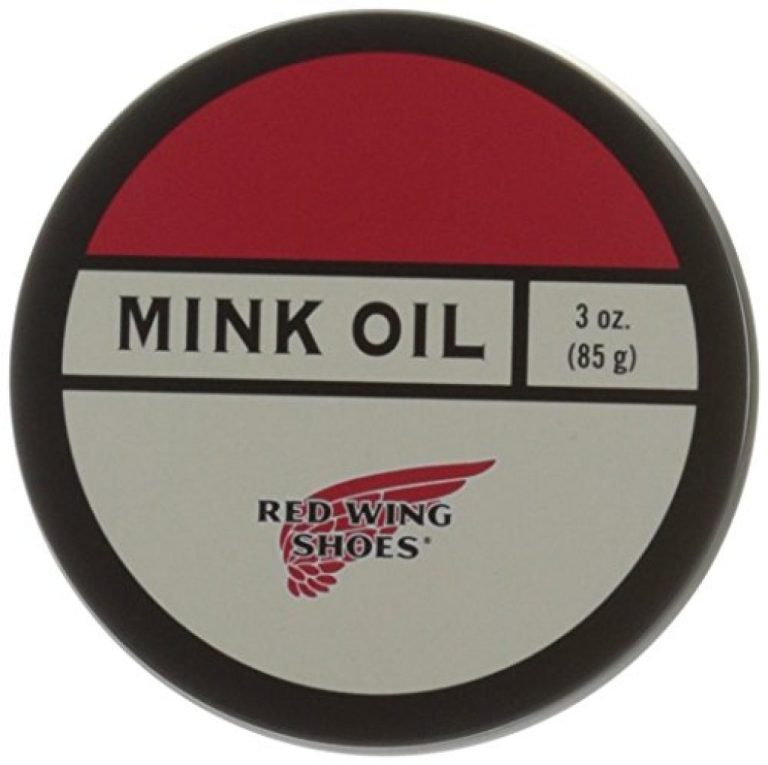
Method 2 — Leather Conditioner or Mink Oil
Conditioning softens leather fibers from the outside, making the material more pliable and responsive to stretching.
How it works: Conditioner penetrates leather fibers, restoring oils and increasing flexibility. The leather becomes easier to mold.
Timeline: 1–2 hours of active wear after application, then overnight rest
Application technique:
- Clean boots with a horsehair brush to remove dust
- Apply thin coats of conditioner using a clean cloth
- Work product into seams and flex points
- Allow to absorb for 15–30 minutes
- Wear boots with thick socks for 1–2 hours
- Let boots rest overnight
Caution: Mink oil may darken leather significantly—always test on an inconspicuous area first. Avoid oversaturation, which can make leather too soft and reduce support.
Method 3 — Boot Stretching Spray
Stretching spray temporarily softens leather, allowing targeted stretching of specific problem areas.
How it works: Spray penetrates leather fibers and temporarily makes them pliable. The leather stretches as you wear the boots, then sets in the new position as it dries.
Timeline: 5–30 minutes before wear
Best for: Targeting specific tight spots rather than overall stretch—ideal for heel counters, toe boxes, or pressure points.
Spray-and-wear technique:
- Identify problem areas (heel, toe box, sides)
- Spray affected areas inside and outside
- Put on thick socks immediately
- Walk around for 20–30 minutes while boots dry
- Repeat daily until comfortable
Method 4 — Domestic Wear (Around the House)
This low-risk method is perfect for first-time boot owners and expensive purchases you might need to return.
How it works: Wearing boots on soft surfaces at home allows gradual break-in while preserving the option to return if sizing is wrong.
Timeline: Approximately 1 week of daily sessions
Why it works:
- Easy to remove boots if pain becomes unbearable
- Doesn’t scuff soles, preserving return eligibility
- Builds foot tolerance gradually
Session length recommendations:
- Day 1–2: 30 minutes
- Day 3–4: 1 hour
- Day 5–7: 2+ hours
- Continue until comfortable for full wear
Method 5 — Thick Socks Method
This passive method uses extra padding to protect your feet while gradually stretching the leather.
How it works: Thick socks create extra volume inside the boot, gently pushing against the leather to stretch it while cushioning your feet from friction.
Timeline: Approximately 1 week
Sock recommendations: Merino wool with moisture-wicking construction works best. Look for heavyweight boot socks with reinforced heel and toe cushioning.
Why cotton socks fail during break-in: Cotton absorbs moisture, traps heat, and creates friction—the perfect recipe for blisters. Merino wool regulates temperature and wicks moisture away from skin.
Method 6 — Boot Rotation (Two-Pair Strategy)
If you need to wear boots daily during break-in, rotating between two pairs gives your feet recovery time.
How it works: Alternating between new boots and an old pair (or a second new pair) allows feet to recover from pressure points while still making progress on break-in.
Timeline: Approximately 2 weeks
Best for: Workers who can’t take time off during break-in or who need boots immediately for a new job.
Rotation strategy:
- Morning: Wear new boots
- After lunch: Switch to broken-in pair if feet are sore
- Alternate full days as tolerance builds
Method 7 — Manual Flexing and Bending
Hand-working the leather before wearing accelerates the softening process at critical flex points.
How it works: Physically bending and flexing the boot mimics the movements your foot makes while walking, pre-softening the leather.
Target areas: Ball of foot crease and ankle bend—these are where boots flex most during walking.
Expert technique (“work the bend” method):
- Hold the boot at heel and toe
- Bend back and forth at the ball of foot
- Flex the ankle area by pressing the heel down
- Work the leather for 5–10 minutes per boot
- Repeat before each wear session
Note: Don’t do this while wearing the boots—work the leather by hand.
Method 8 — Warm Water and Wear (Use Cautiously)
A light moisture method can make leather temporarily pliable for custom molding.
How it works: Slightly dampening leather makes fibers more flexible. As the boot dries on your foot, it molds to your shape.
Caution: Excessive water damages leather, causes warping, and leads to cracking. This is NOT the same as soaking boots—use only light misting.
When to use: As a last resort for stubborn areas after other methods have been tried.
When to avoid: On expensive heritage boots, oil-tanned leather, or boots with specialized waterproof treatments.
Technique:
- Lightly mist (don’t soak) problem areas with a spray bottle
- Immediately put on thick socks and boots
- Wear until boots dry completely
- Apply conditioner afterward to restore oils
Method 9 — Rubbing Alcohol (Diluted)
Diluted alcohol softens leather fibers and evaporates quickly, allowing for targeted stretching.
How it works: Alcohol temporarily breaks down leather fibers, making them pliable. It evaporates faster than water, reducing damage risk.
Dilution ratio: Mix 50% rubbing alcohol with 50% water
Application method:
- Apply mixture to specific pressure points only
- Rub in gently with a cloth
- Put on boots immediately while damp
- Walk for 15–20 minutes
- Apply conditioner after to restore moisture
Best for: Targeting specific pressure points rather than overall break-in.
Method 10 — Heat and Wear (Riskiest Method)
Heat temporarily softens leather but carries significant damage risk.
How it works: Warmth makes leather fibers more pliable, allowing faster molding. However, direct heat causes cracking, drying, and permanent damage.
Major caution: Never use direct heat from hair dryers on high settings, radiators, or ovens. Heat above 150°F can destroy leather.
Safer alternative: Body heat inside thick socks provides gentle warmth without risk. Your foot naturally warms the leather as you wear it.
If using heat:
- Use only the lowest setting on a hair dryer
- Hold 12+ inches away from leather
- Keep dryer moving—never focus on one spot
- Limit to 30 seconds per area
- Put on boots immediately after warming
The Ultimate 24-Hour Break-In Protocol (Method Stacking)

When you need boots ready for work tomorrow, combining multiple methods dramatically accelerates break-in. This aggressive protocol is only for boots that already fit correctly.
Morning:
- Clean boots with horsehair brush
- Apply leather conditioner generously to uppers, flex points, and collar
- Let absorb for 30 minutes
Afternoon:
- Insert boot stretcher
- Adjust to gentle pressure on tight areas
- Leave in place for 4–5 hours
Evening:
- Remove stretcher
- Put on thickest Merino wool socks
- Wear boots for 2 hours doing domestic activities (walking, light chores)
- Note any remaining tight spots
Next Morning:
- Apply stretching spray to any remaining problem areas
- Put on thick socks and boots
- Wear to work—bring backup shoes just in case
Caution: This protocol only works for boots that fit correctly. It won’t fix wrong sizing—it just speeds up the natural break-in process.
Blister and Pain Prevention Strategies
Breaking in boots doesn’t have to mean suffering. Proactive protection strategies minimize pain and prevent blisters before they start.
Sock Selection — Why Material Matters

Your sock choice during break-in can make or break the experience.
Merino wool benefits:
- Wicks moisture away from skin
- Provides superior cushioning
- Regulates temperature (warm when cold, cool when hot)
- Naturally antimicrobial (reduces odor)
Why cotton traps moisture and causes friction: Cotton absorbs sweat and holds it against your skin, creating the perfect environment for blisters. Wet cotton also loses cushioning and increases friction.
Sock thickness recommendations by break-in stage:
- Week 1: Heavyweight Merino wool
- Week 2: Medium weight
- Week 3+: Your normal preferred thickness
Double Sock Method
Layering socks reduces friction between your foot and the boot by transferring movement to the space between sock layers.
How it works: A thin liner sock sits against your skin while a thicker outer sock contacts the boot. Friction occurs between the two sock layers instead of against your skin.
Friction reduction potential: Some sources cite 25–40% reduction in friction-related injuries using this method.
When to use vs when single thick sock is sufficient: Use double socks for aggressive break-in schedules or if you have a history of blisters. A single thick sock often works for gradual break-in.
Moleskin and Blister Padding
Preemptive padding prevents hotspots from becoming painful blisters.
Where to apply:
- Heel (most common blister location)
- Sides of big and little toes
- Any area that feels like a “hotspot” during initial wear
Pre-emptive application vs reactive patching: Apply moleskin BEFORE you feel pain. Once a hotspot develops, it’s already progressing toward a blister. Prevention beats treatment.
Application technique:
- Cut moleskin to size—slightly larger than problem area
- Clean and dry skin thoroughly
- Apply with gentle pressure
- Replace daily during heavy break-in
Heel-Lock Lacing Technique

This lacing pattern creates a “heel lock” that prevents slippage—the primary cause of heel blisters.
How it works: The heel-lock creates a loop at the top eyelets that pulls the heel firmly into the heel counter, preventing up-and-down movement.
Step-by-step lacing pattern:
- Lace boots normally through all eyelets except the top two
- Thread each lace UP through the top eyelet on the same side (creating a vertical loop)
- Cross laces over and thread THROUGH the opposite loop
- Pull tight and tie normally
Friction reduction potential: Sources indicate up to 50% reduction in heel friction and slippage using this technique.
What NOT to Do — Common Break-In Mistakes

Avoid these common mistakes that damage boots or prolong discomfort.
- Never soak boots in water. Full submersion warps leather, destroys structure, and causes irreversible cracking. Light misting is different from soaking.
- Never use direct heat from hair dryers on high settings, radiators, ovens, or leaving boots in hot cars. Heat above 150°F dries out leather and causes permanent cracking.
- Never wear new boots for a full shift immediately. Your first day in new boots should be a few hours at most. Pushing through pain creates injuries that set back the entire process.
- Never ignore hotspots. That warm, tender feeling is a pre-blister warning. Stop, apply padding, and address the cause before it becomes a painful, productivity-killing blister.
- Never oil the inside of boots. Interior conditioning traps moisture, breeds bacteria, and creates unpleasant odors. Only condition exterior leather.
- Never skip fit verification before committing to break-in. If boots are the wrong size, no amount of breaking in will make them comfortable. Verify fit first—then invest time in break-in.
Boot-Specific Break-In Considerations
Different boot constructions and features require tailored approaches. Generic advice doesn’t work for every boot.
Steel Toe vs Composite Toe
Both safety toe types must meet ASTM F2413 protective footwear standards for impact and compression resistance. Understanding the full standard helps you select the right protection level—our ASTM F2413-24 Explained guide breaks down every classification code.
Break-in timeline: Similar for the leather portion—the safety toe cap itself doesn’t break in.
Comfort differences: Composite toe is lighter and doesn’t transfer cold/heat as dramatically as steel. This can improve comfort during break-in in extreme temperatures.
Safety standard note: According to OSHA’s foot protection standards (29 CFR 1910.136), employers must provide protective footwear when hazards exist. Both steel and composite toes meet requirements when properly rated.
Goodyear Welt vs Cement Construction

Goodyear welt:
- Cork midsole molds to foot shape over time
- Longer initial break-in period
- Superior long-term comfort as boot becomes truly custom
- Can be resoled multiple times
Cement construction:
- Softer out of box, faster initial comfort
- Shorter break-in period
- Less moldability over time
- Typically cannot be resoled
For detailed construction differences, see our Work Boot Anatomy & Construction Materials guide.
Leather Thickness Impact
Thicker leather (8–9 oz):
- Longer break-in period
- More durable long-term
- Better protection against abrasion and puncture
- Holds shape better over years of use
Standard thickness:
- Faster break-in
- May wear faster in harsh conditions
- Lighter weight
Heritage brands vs mass-market comparison: Pacific Northwest heritage makers (Nicks, Whites, Wesco) typically use thicker, higher-grade leather requiring extended break-in. Mass-market imports often use thinner, pre-softened leather for faster comfort.
BOA Lacing System Boots
BOA dial lacing systems are increasingly common in modern work boots, offering a different break-in experience.
No traditional lace break-in required: The dial system provides consistent tension from day one—no stretching of laces or breaking in of eyelet friction.
Micro-adjustable fit from day one: Dial systems allow precise tension adjustments that traditional lacing can’t match. You can loosen or tighten instantly throughout the day.
Even pressure distribution reduces hotspots: BOA distributes pressure evenly across the entire lacing zone, eliminating the pressure point variations that create hotspots with traditional lacing.
Brands offering BOA work boots: Several major manufacturers now include BOA options in their safety footwear lines.
Made-in-USA Heritage Boots vs Imported Boots
PNW heritage boots (Nicks, Whites, JK Boots):
- Expect extended break-in period (often 100+ hours)
- Heavy-duty leather and construction
- Custom fit potential after proper break-in
- Often built to individual measurements
Mass-market imports:
- Generally shorter break-in
- Pre-softened leather and synthetic components
- More consistent sizing but less moldability
- Lower initial discomfort, potentially less long-term comfort
Quality trade-offs to consider: Faster break-in often comes from thinner materials or synthetic components. This isn’t necessarily bad—it depends on your priorities and work environment. If you’re interested in brand-specific warranty support during break-in issues, our guide on Red Wing Boots Warranty explains what’s covered.
Break-In by Occupation
Different jobs put different demands on your feet. Your break-in approach should match your work environment. For comprehensive job-specific recommendations, see our Work Boots by Job Type Guide.
Construction Workers
Construction demands high-flex movement, uneven terrain navigation, and often climbing or kneeling.
Challenges:
- High-flex demands at ball of foot
- Variable surfaces stress different parts of boot
- Kneeling and squatting require ankle flexibility
Recommended method priority:
- Manual flexing (critical for flex point prep)
- Leather conditioner (soften flex zones)
- Domestic wear on varied surfaces
Warehouse and Logistics
Warehouse work involves standing on hard concrete surfaces and repetitive walking patterns, often for 10–12 hour shifts.
Challenges:
- Concrete floors provide no shock absorption
- Repetitive motions stress the same areas repeatedly
- Long shifts amplify any comfort issues
Insole timing recommendations: Consider adding aftermarket insoles sooner rather than later if you work on concrete. The Work Boot Problems & Solutions Troubleshooting Guide covers insole selection and common warehouse foot issues.
Linemen and Utility Workers
Linemen face unique demands: climbing poles and ladders requires maximum ankle support and precise foot control.
Challenges:
- Climbing demands put stress on ankle collar
- Wedge sole vs heeled boot affects ladder grip
- Ankle support is critical for safety
Wedge sole vs heeled boot considerations: Wedge soles provide comfort on flat surfaces but heeled boots offer better ladder grip. Break-in approach varies—heeled boots need more ankle flex work.
Outdoor and Forestry Work
Forest work exposes boots to moisture, mud, uneven terrain, and temperature extremes.
Challenges:
- Constant moisture exposure
- Variable terrain requires flexible yet supportive boots
- Weather extremes affect leather condition
Climate-specific conditioning advice: In wet environments, condition boots more frequently and ensure proper drying between wears. Moisture accelerates leather breakdown if not managed properly.
Climate Considerations for Break-In
Your local climate significantly affects both break-in timeline and technique selection.
Hot and Humid Climates
Heat and humidity make feet swell and sweat more, changing break-in dynamics.
Moisture management during break-in:
- Change socks midday if feet are sweaty
- Use boot dryers after each wear
- Allow boots to dry completely between sessions
Conditioning frequency adjustments: Humid environments can cause over-conditioning if you apply product too frequently. Condition less often than in dry climates.
Sock material priority: Merino wool’s moisture-wicking properties become even more critical in humid conditions.
Cold and Dry Climates
Cold temperatures make leather stiffer and less responsive to break-in efforts.
Leather stiffness in cold temperatures: Leather becomes significantly stiffer in cold weather, making break-in more difficult. Cold leather is also more prone to cracking.
Indoor warm-up before outdoor wear: Warm boots to room temperature before extended outdoor wear. Cold leather stressed too quickly can crack.
Conditioning to prevent cracking: Dry winter air pulls moisture from leather. Condition slightly more frequently to maintain pliability and prevent cracking.
When to Add Insoles or Orthotics
Timing your insole addition correctly can make or break your break-in experience.
Break in boots with factory insoles first. The factory insole allows the boot to mold to your foot properly. Adding thick custom insoles too early changes the fit and can throw off the break-in process.
Add custom insoles after initial break-in (typically after 1–2 weeks). Once the leather has conformed to your general foot shape, custom insoles can address specific comfort needs.
Sizing consideration: Custom insoles may require half-size-up boots. If you know you’ll need orthotics, account for their thickness when selecting boot size initially.
When orthotics are essential from day one: If you have a medical condition requiring specific orthotic support, consult with a podiatrist about boot selection. Some conditions require orthotic use from the start—proper sizing becomes even more critical.
Troubleshooting — When Break-In Isn’t Working

If you’ve been working on break-in for weeks with no improvement, something else is likely wrong.
| Symptom | Likely Cause | First Fix |
|---|---|---|
| Persistent heel blisters | Heel slippage | Heel-lock lacing + thicker heel padding |
| Toe box pressure | Too narrow | Boot stretcher with bunion plugs |
| Arch pain | Poor arch support | After-market insoles (post break-in) |
| Ankle rubbing | Stiff collar | Conditioner on collar + ankle padding |
| Overall tightness | Wrong size | Professional fitting verification |
| Leather not softening | Under-conditioning | Additional conditioner application |
For comprehensive troubleshooting beyond break-in issues, our Work Boot Problems & Solutions Troubleshooting Guide covers everything from squeaking to sole separation.
See It in Action: Visual Reality Check
Reading about break-in methods is one thing—watching someone actually demonstrate the techniques on real boots shows you the pressure, pace, and precision that text alone can’t capture. A good visual walkthrough reveals the subtle mistakes beginners make and the “feel” you should expect at each stage.
▶️ Watch this setup/walkthrough: How to Break In Work Boots – Practical Demonstration
Video Summary
Expected focus:
- How to properly apply leather conditioner to flex points and high-wear areas
- Correct technique for manual flexing and bending without damaging the boot
- Demonstration of thick sock method and domestic wear approach
- Visual comparison of stiff leather vs. conditioned leather behavior
- Common pressure points to watch for during initial wear sessions
What to look for in this video (Analyst’s Watch-List):
- 📏 Scale/Context Check: Notice how much conditioner is “enough”—a thin coat vs. oversaturation looks very different on camera.
- ⏱️ Time/Workflow Check: Pay attention to how long they let conditioner absorb before wearing—rushing this step is a common mistake.
- ⚠️ Risk Check: Watch for the moment they flex the boot—notice the angle and pressure applied. Too aggressive = cracked leather; too gentle = no progress.
- ✅ Proof Check: Look for before/after flexibility comparison—do they show the boot bending more easily after treatment?
- 🧩 Complexity Check: Count how many products and tools are actually used—does it match the “simple” claim or require a full kit?
- 🔊 Sound/Noise Check: Listen for leather creaking sounds—stiff leather sounds different from properly conditioned leather when flexed.
- 🔁 Repeatability Check: Do they mention how many sessions this took, or is it presented as a “one-time fix”?
What to watch for: Don’t confuse softening the leather with stretching the boot—the video should treat conditioning (pliability) and stretching (size adjustment) as separate goals requiring different techniques.
Frequently Asked Questions
How long does it take to break in work boots?
Natural break-in takes approximately 80–100 hours of wear. Accelerated methods can reduce this to 1 day to 2 weeks depending on technique intensity and boot construction.
What is the fastest way to break in work boots?
A boot stretcher combined with leather conditioner and thick socks can achieve significant break-in within 24 hours for properly fitted boots. This method stacking approach addresses multiple aspects simultaneously.
Can you break in work boots in one day?
Partial break-in is possible using method stacking (stretcher + conditioner + thick socks), though complete break-in—where the cork midsole fully molds to your foot—takes longer.
Should you soak work boots in water?
No. Soaking damages leather, causes warping, and leads to cracking. Light misting with stretching spray is the safer alternative when moisture-based methods are needed.
What socks are best for breaking in work boots?
Thick Merino wool socks with moisture-wicking properties. Avoid cotton, which traps moisture and increases friction that causes blisters.
Do steel toe boots take longer to break in?
The steel or composite toe cap itself doesn’t affect break-in. The leather portion breaks in at the same rate as non-safety boots of similar construction and leather thickness.
How do you prevent blisters when breaking in work boots?
Gradual wear progression, thick moisture-wicking socks, moleskin on hotspots before they become blisters, and heel-lock lacing technique to prevent slippage.
Can mink oil help break in boots faster?
Yes, mink oil softens leather fibers effectively and increases pliability. However, it significantly darkens most leathers—always test on an inconspicuous area first.
How long does it take to break in Red Wing boots vs Thorogood?
Red Wing typically uses thicker leather and requires longer break-in. Thorogood is generally more comfortable out of the box due to softer leather and synthetic midsole components.
Should you wear work boots around the house first?
Yes. Domestic wear is a critical first step—it allows for return if sizing is wrong (don’t scuff the soles) and builds tolerance gradually on soft, forgiving surfaces.
Does Goodyear welt construction affect break-in time?
Yes. The cork midsole in Goodyear welt boots molds to your foot over time, requiring longer initial break-in but providing superior long-term comfort and custom fit.
How do BOA lacing system boots compare for break-in?
BOA systems eliminate traditional lace break-in entirely and provide micro-adjustable fit with even pressure distribution from day one. The leather still needs break-in, but lacing discomfort is eliminated.
How often should you condition boots during break-in?
Once at the start of break-in to soften leather, then every 3–6 months for ongoing maintenance. Over-conditioning can make leather too soft and reduce support.
Related Resources
For a complete foundation in work boot selection and care, start with our Work Boots 101 primer—it ties safety features to jobsite risks and helps you understand what you’re breaking in and why it matters.
This article was researched and written by the SturdyBoot.com editorial team. We reference industry standards including ASTM F2413-24 for safety footwear specifications and OSHA 29 CFR 1910.136 for workplace foot protection requirements.